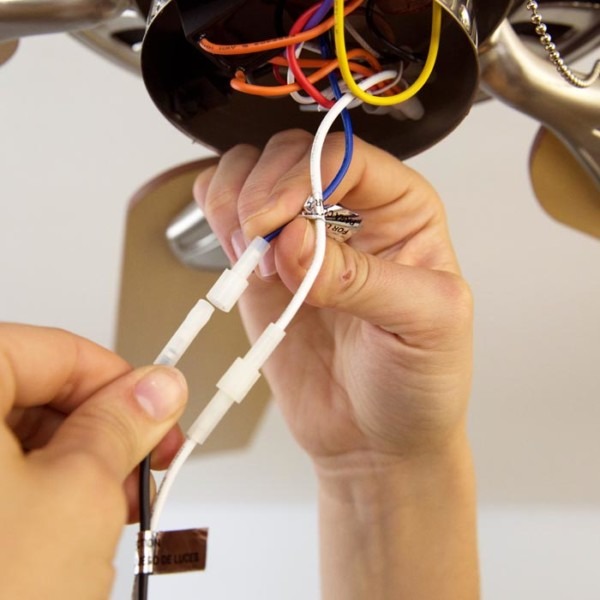
Home » Without Label » How To Install A Ceiling Fan Speed Control Switch / Ceiling Fan Wiring Diagram Light Switch | House Electrical ... : Attach the ground wire from the fan to the ground wire in the ceiling.
How To Install A Ceiling Fan Speed Control Switch / Ceiling Fan Wiring Diagram Light Switch | House Electrical ... : Attach the ground wire from the fan to the ground wire in the ceiling.
How To Install A Ceiling Fan Speed Control Switch / Ceiling Fan Wiring Diagram Light Switch | House Electrical ... : Attach the ground wire from the fan to the ground wire in the ceiling.. Top off each connection with a plastic wire nut. My understanding is that a proper variable speed fan control (not a dimmer) would operate in exactly the same manner as the remote control unit. Wiring ceiling fans can seem complicated, but the task really just depends on the type of fan you are installing and how you want it to operate. Includes a kill switch to turn fan off quickly. In this tutorial, we will wire and connect the ceiling fan to the power supply and control it through single way switch which further control the fan speed by dimmer or speed control regulator switch.
In order to control the fan's speed, the fan needs its own system of wires, separate from that of the lighting element. You might also like other videos of mine. It squeezes both a fan speed control and a light dimmer switch into a single gang. Controls an unlimited amount of ceiling fans within 100ft range. Or, if the new switch has wire leads, twist them together with the appropriate wire from the fan, then secure the connection with a wire nut.
Ceiling Fan Speed Control Wiring Diagram Collection from wholefoodsonabudget.com This video describes an easy way to replace a 3 speed ceiling switch. Locating this wire can be a little tricky at times, but you can normally trace the rough route of the wire. Start by turning off the light and ceiling fan at the fuse box. Hold up the new speed control switch and notice if there are wires already installed, or if there are terminals. Insert the fan's wires into slots on the new switch. Hunter breeze fan & light switch. Or, if the new switch has wire leads, twist them together with the appropriate wire from the fan, then secure the connection with a wire nut. The red wire is for a separate switch for the light of the ceiling fan.
Suggested by brian l,this will only work with the non remote based fans, if it has a remote it likely wont work, i don't much care for remote fans to be ho.
Locating this wire can be a little tricky at times, but you can normally trace the rough route of the wire. Just type lsailor1 in the youtube search bar. How is a dimmer and fan control switch wired for my ceiling fan? Install the ceiling fan remote receiver before you begin, set the fan speed to high. A ceiling fan's wiring is integral when it comes to controlling its speed. Insert the fan's wires into slots on the new switch. This is because you will need to cut the wires and install the switch in line with the fan. If you install a ceiling fan without wiring it properly, it may prove impossible to operate the fan without the light on and vice versa. A dimmer switch for motor speed control can be installed with a few precautions and considerations in mind. Turn the wall switch to the off position. Top off each connection with a plastic wire nut. The red wire is for a separate switch for the light of the ceiling fan. The black wire is for a separate switch for the ceiling fan motor.
Whether you are looking to wire a ceiling fan with lights to one power switch, or add a fan in a room without a switch source, this guide will teach you how to wire a ceiling fan using four common scenarios and the best wiring methods. This video describes an easy way to replace a 3 speed ceiling switch. Insert the fan's wires into slots on the new switch. Avoid compatibility issues with the switch that may cause the fan to spin. Attach the new pull switch to the ceiling fan after stripping the plastic from the wires to expose the copper wire, attach the two wires of the new ceiling fan chain pull switch to the fan's wires.
How To Install Light Kit On Ceiling Fan from www.chanish.org Includes a kill switch to turn fan off quickly. Wiring a ceiling fan dimmer & control switch ad#block electrical question: This is potentially dangerous and you would need to buy a special dimmer switch and a fan speed control. The red wire is for a separate switch for the light of the ceiling fan. Before you switch off the power, have the ceiling fan set at the highest level. You might also like other videos of mine. Attach the ground wire from the fan to the ground wire in the ceiling. Place the new switch in the body over the pull chain and threads.
Controls an unlimited amount of ceiling fans within 100ft range.
How is a dimmer and fan control switch wired for my ceiling fan? Wiring a ceiling fan dimmer & control switch ad#block electrical question: You might also like other videos of mine. Place the new switch in the body over the pull chain and threads. This is definitely the easier option, however, it may be quite fiddly and annoying to switch between the two settings. Includes a kill switch to turn fan off quickly. If you install a ceiling fan without wiring it properly, it may prove impossible to operate the fan without the light on and vice versa. In this tutorial, we will wire and connect the ceiling fan to the power supply and control it through single way switch which further control the fan speed by dimmer or speed control regulator switch. Turn the wall switch to the off position. The red wire is for a separate switch for the light of the ceiling fan. This is because you will need to cut the wires and install the switch in line with the fan. A ceiling fan's wiring is integral when it comes to controlling its speed. Be aware that a standard light dimmer switch will not work with a ceiling fan.
The first option is to simply install a toggle switch onto your ceiling fan and control the light and speed settings with the pull switch on the actual fan. It uses wifi, so there's no additional hub. Just type lsailor1 in the youtube search bar. Hunter breeze fan & light switch. The red wire is for a separate switch for the light of the ceiling fan.
How To Install Ceiling Fan And Light/fan Control Switch On ... from www.diychatroom.com Just type lsailor1 in the youtube search bar. The red wire from the wall switch typically connects to the blue wire. The red wire is for a separate switch for the light of the ceiling fan. 2 black 2 white.( with ground) both white wires are connected together, leaving the black wires to be hooked up to the new switch. Avoid compatibility issues with the switch that may cause the fan to spin. In order to control the fan's speed, the fan needs its own system of wires, separate from that of the lighting element. First we'll start by attaching the ground. Controls an unlimited amount of ceiling fans within 100ft range.
Or, if the new switch has wire leads, twist them together with the appropriate wire from the fan, then secure the connection with a wire nut.
Turn the wall switch to the off position. Installing dimmer switches is a seemingly easy way to control a ceiling fan and/or a lighting fixture. If wires, then use wire connectors and attach the like colored wires together. Insert the fan's wires into slots on the new switch. The first option is to simply install a toggle switch onto your ceiling fan and control the light and speed settings with the pull switch on the actual fan. My understanding is that a proper variable speed fan control (not a dimmer) would operate in exactly the same manner as the remote control unit. Wiring ceiling fans can seem complicated, but the task really just depends on the type of fan you are installing and how you want it to operate. First we'll start by attaching the ground. Hold up the new speed control switch and notice if there are wires already installed, or if there are terminals. Controls an unlimited amount of ceiling fans within 100ft range. You might also like other videos of mine. There is a lot to like about this treatlife ceiling fan & light dimmer switch. Next, we'll start by attaching the white.